Blog
Linux to MacOS cross-compilation
Last time, I explained how to compile and distribute a game for Windows from Linux. This time, I'll do the same thing, but with MacOS as the target system, a procedure that is a little less well documented on the Internet.
OSXCross
MinGW allowed us to compile Windows programs from Linux, now it is software called OSXCross which allows us to do the same for MacOS programs. Unlike MinGW, the latter is not included in the repositories of the usual distributions, and we will thus have to install it by hand.
First, you have to download XCode from the official website, which requires creating an account (grrr, but nevermind). Be careful, the file is large (around 10 GiB), so be sure to get the right version (check what is compatible with what, between OSXCross, XCode and the oldest MacOS you want to support). Personally, I use XCode 11, which supports MacOS Catalina.
Then, just follow the procedure described on OSXCross
Github, package the SDK,
move it to the tarballs folder, etc.
We simply compile OSXCross with build.sh.
We then add the path of the installed executables, personally I put
everything in /home/gee/local/osxcross. We also specify the target
version of MacOS, all of this inside our .bashrc, .zshrc. or
whatever:
export MACOSX_DEPLOYMENT_TARGET=10.15
export PATH=/home/gee/local/osxcross/bin:$PATH
If you take a look at the contents of ${INSTALL_PATH}/bin, you'll
find things that look a lot like what we had with MinGW:
x86_64-apple-darwin19-clang++to compile C++ for 64-bit architecturex86_64-apple-darwin19-clangsame for Cx86_64-apple-darwin19-otoolwhich displays the objects and libraries used by an executable (we will recall this below)
In short, macOS development tools but on your Linux!
Third-party libraries
Again, a reminder that Superflu Riteurnz relies on 3 third-party libraries:
These libraries work well on Linux, Windows ... and MacOS. To install them, OSXCross provides a port of Macports, so you can very simply do:
$ osxcross-macports install libsdl2 libsdl2_image libsdl2_mixer libsdl2_ttf libyaml lz4
These libraries are installed in the usual tree structure (lib,
include, etc.) within the {INSTALL_PATH}/macports/pkgs/opt/local/
folder.
Setup & build
Again, this will remind you of the MinGW article, since we're going to use a toolchain CMake file:
set(CMAKE_SYSTEM_NAME Darwin)

set(TOOLCHAIN_PREFIX x86_64-apple-darwin19)
set(CMAKE_C_COMPILER ${TOOLCHAIN_PREFIX}-clang)
set(CMAKE_CXX_COMPILER ${TOOLCHAIN_PREFIX}-clang++)
set(CMAKE_C_COMPILER_AR ${TOOLCHAIN_PREFIX}-ar)
set(CMAKE_CXX_COMPILER_AR ${TOOLCHAIN_PREFIX}-ar)
set(CMAKE_LINKER ${TOOLCHAIN_PREFIX}-ld)

set(CMAKE_FIND_ROOT_PATH /home/gee/local/osxcross/macports/pkgs/opt/local/)
set(CMAKE_OSX_SYSROOT /home/gee/local/osxcross/SDK/MacOSX10.15.sdk/)
set(CMAKE_REQUIRED_MAC_LIBS "libyaml-0.2.dylib;libSDL2-2.0.0.dylib;libSDL2_image-2.0.0.dylib;libSDL2_ttf-2.0.0.dylib;libSDL2_mixer-2.0.0.dylib;liblz4.1.dylib;liblz4.1.9.3.dylib;libpng16.16.dylib;libjpeg.8.dylib;libjpeg.8.2.2.dylib;libtiff.5.dylib;libz.1.dylib;libz.1.2.11.dylib;libwebp.7.dylib;libmodplug.1.dylib;libvorbisfile.3.dylib;libvorbis.0.dylib;libFLAC.8.dylib;libmpg123.0.dylib;libopusfile.0.dylib;libzstd.1.dylib;libzstd.1.5.2.dylib;liblzma.5.dylib;libogg.0.dylib;libopus.0.dylib")
The CMAKE_REQUIRED_MAC_LIBS variable is filled in by hand, which I'm
not really happy with it, but I couldn't do better: it's all the
libraries needed to run the executable. To find them, just use the
command x86_64-apple-darwin19-otool on the executable, look at which
libraries are displayed, and start again on each library until you
have done the trick. Yes, it can also be scripted.
Then we just need to run CMake with this toolchain file and compile
normally with make, which gives us a MacOS compatible
superfluous-returnz executable!
Home-made installer
You know the deal: an executable is very nice, but it's not quite enough to share a game. For Windows, we were able to take advantage of the CPack generator NSIS, unfortunately the "classic" DragNDrop generator for MacOS is only available… on MacOS. Never mind: we'll take care of it the old-fashioned way, by hand!
A lot of apps on MacOS are distributed in the form of a DMG file,
which roughly corresponds to a folder ending in .app with a certain
normalized tree structure that we will compress. The tree structure
we're going to use looks like this:
superfluous-returnz.app
└── Contents
    ├── Info.plist # List of properties
    ├── MacOS
    │   └── superfluous-returnz # The executable
    └── Resources
        ├── data
        |   ├── # The data of the game
        │   └── # (...)
        ├── icon.icns # The icon of the game
        └── libs
            ├── # Third-party libraries
            └── # (...)
The icon is in the .icns format: you can easily convert a PNG to
ICNS with the png2icns program available in the icnsutils package
(on Debian and derivatives, but I imagine it is also available in
other distributions). The Info.plist file is an XML format file that
contains a set of properties:
<?xml version="1.0" encoding="UTF-8"?>
<!DOCTYPE plist PUBLIC "-//Apple//DTD PLIST 1.0//EN" "http://www.apple.com/DTDs/PropertyList-1.0.dtd">
<plist version="1.0">
<dict>
    <key>CFBundleName</key>
    <string>superfluous-returnz</string>
    <key>CFBundleDisplayName</key>
    <string>Superfluous Returnz</string>
    <key>CFBundleIdentifier</key>
    <string>net.ptilouk.superfluous</string>
    <key>CFBundleVersion</key>
    <string>1.1.0</string>
    <key>CFBundlePackageType</key>
    <string>APPL</string>
    <key>CFBundleSignature</key>
    <string>sflu</string>
    <key>CFBundleExecutable</key>
    <string>superfluous-returnz</string>
    <key>CFBundleIconFile</key>
    <string>icon</string>
</dict>
</plist>
Even if the CPack generator to create a DMG is not available on Linux, we can still specify an installation procedure that generates the desired tree via CMake:
if (CMAKE_SYSTEM_NAME STREQUAL Darwin)
  target_compile_options(${SOSAGE_EXE_NAME} PUBLIC -DSOSAGE_INSTALL_DATA_FOLDER="data/")
  install(TARGETS ${SOSAGE_EXE_NAME} DESTINATION "${SOSAGE_EXE_NAME}.app/Contents/MacOS")
  install(DIRECTORY ${SOSAGE_DATA_FOLDER}/data/ DESTINATION "${SOSAGE_EXE_NAME}.app/Contents/Resources/data")
  foreach(lib ${CMAKE_REQUIRED_MAC_LIBS})
    install(FILES ${CMAKE_FIND_ROOT_PATH}/lib/${lib} DESTINATION "${SOSAGE_EXE_NAME}.app/Contents/libs/")
  endforeach()
  install(FILES "${SOSAGE_DATA_FOLDER}/resources/Info.plist" DESTINATION "${SOSAGE_EXE_NAME}.app/Contents/")
  install(FILES "${SOSAGE_DATA_FOLDER}/resources/icon.icns" DESTINATION "${SOSAGE_EXE_NAME}.app/Contents/Resources")
endif()
Hence the interest of having listed the necessary libraries in the
CMAKE_REQUIRED_MAC_LIBS variable.
There, you might think it should be enough to compress this folder in
DMG format to have our installer… but of course, it is not so
simple. The main problem is that your program is linked to 3rd party
libraries with an absolute path that points to the .dylib files on
your system ... but of course we want to point to those provided in
the DMG!
I tried quite a few methods to do this through CMake but didn't come
to anything conclusive, so I ended up making a script that uses the
tools provided by OSXCross: otool to parse the binaries, and
install_name_tool to change the pointed link.
In practice, we will simply want to replace links in the format
/opt/local/lib/[library.dylib] by a format
@executable_path/../libs/[library.dylib] (@executable_path
specifying the location of the executable, as you may have
guessed). So I tinkered with a Python script that you just have to
call on the executable as well as all the dylib files and which
takes care of the stuff:
import subprocess
import sys

for exe in sys.argv[1:]:
    libs = subprocess.check_output('x86_64-apple-darwin19-otool -L ' + exe, shell=True).decode().split('\n')
    for l in libs:
        if '/opt/local/lib/' in l:
            lname = l.split('/opt/local/lib/')[1].split(' ')[0]
            old = '/opt/local/lib/' + lname
            new = '@executable_path/../libs/' + lname
            subprocess.run('x86_64-apple-darwin19-install_name_tool -change "' + old + '" "' + new + '" ' + exe, shell=True, check=True)
It's a little dirty, but well ... it works.
Then, everything is ready to generate our DMG file, which we can do
very simply with the genisoimage command:
$ genisoimage -V superfluous-returnz.app -D -R -apple -no-pad -o superfluous-returnz.dmg install
Ideally, to make a true "drag'n'drop" MacOS-flavored installer, we should add a wallpaper and place the game icon next to a shortcut to the " Applications" of macOS by inviting to drop the first on the second. This is for example what the game Supertux does:
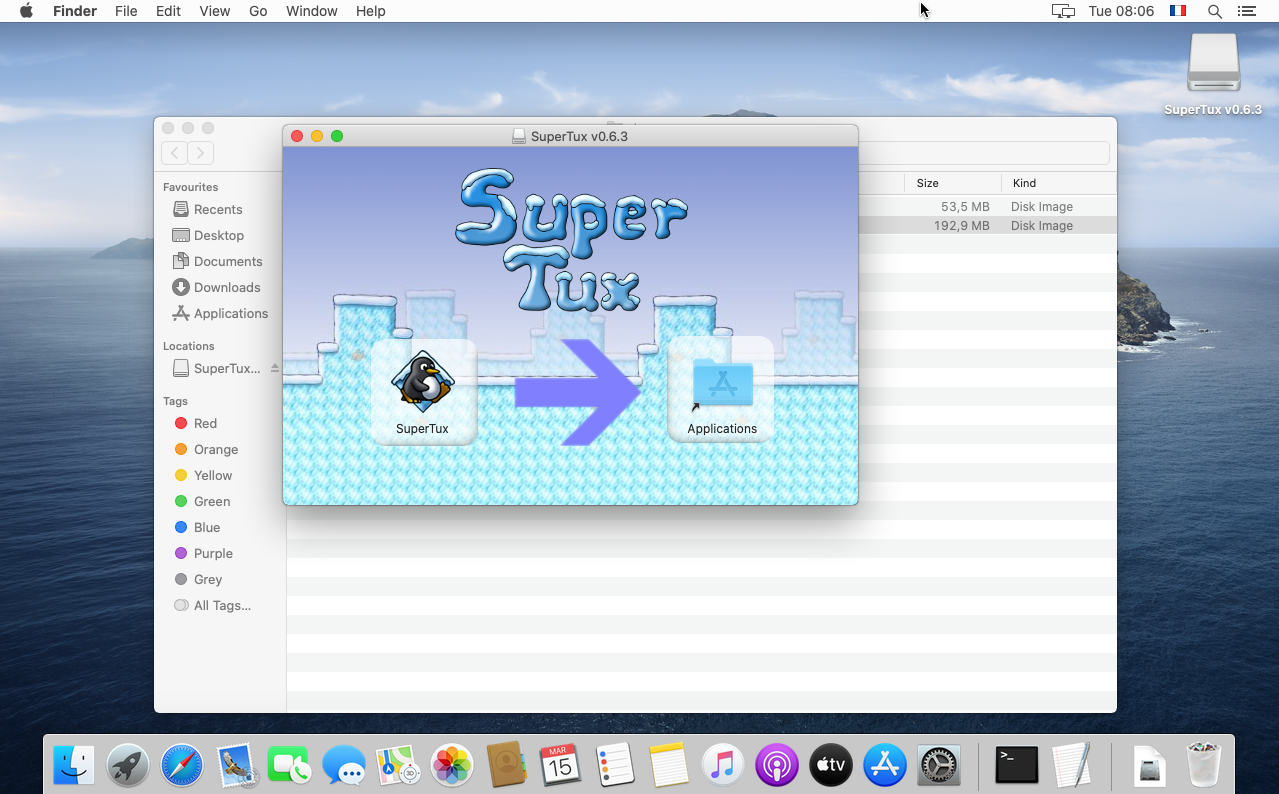
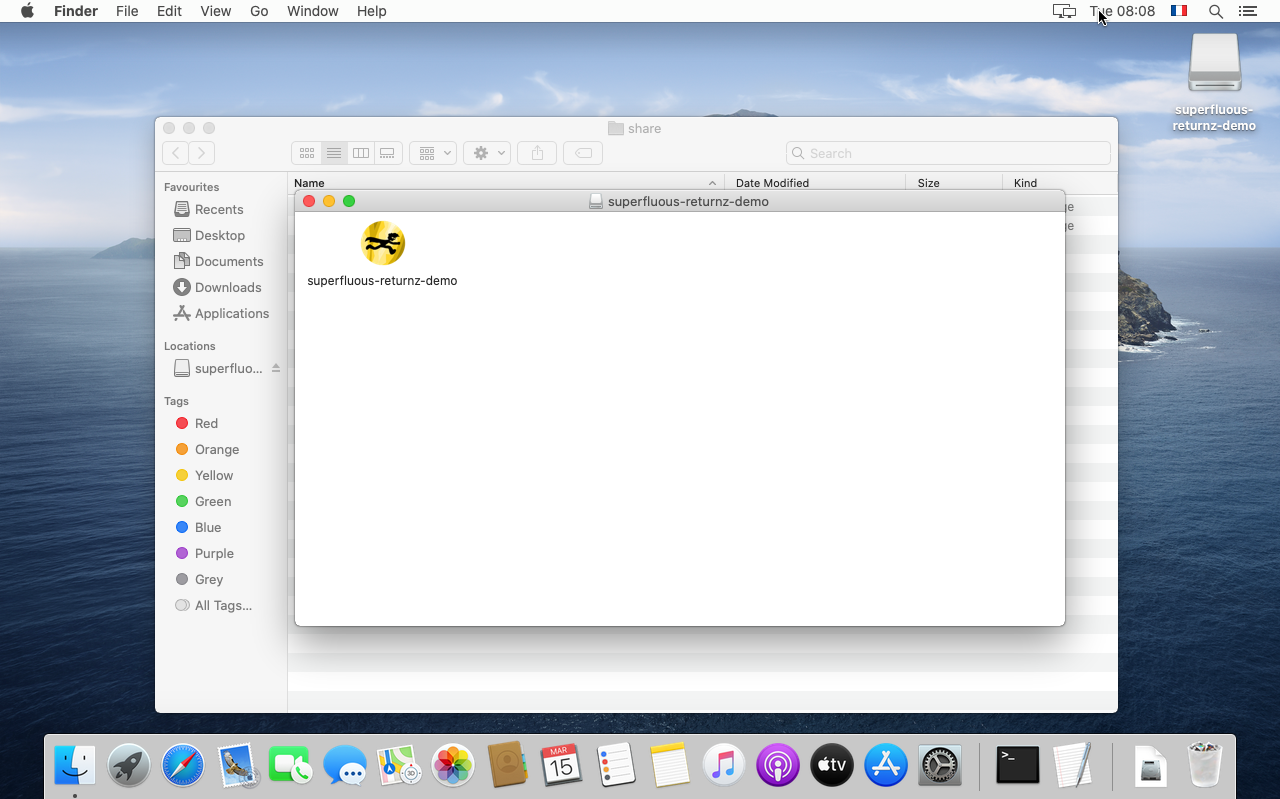
Unfortunately, I couldn't find an elegant way to do this without
"manual" manipulations on a MacOS by copying and pasting the
.DS_store file from the directory ... so I preferred to skip this
step. I guess people using MacOS are used to it and will understand
that you have to copy the game to "Applications" to actually install
it on the machine.
Virtual machine test
Unlike Microsoft, Apple does not provide virtual machines of its
operating system: fortunately, a script named
macos-virtualbox
is available to generate a VM from Apple's installer files. It's a
little more tedious than for Windows, but nothing insurmountable, just
follow the README of the project.
Once our virtual machine is configured, we can transfer the game, launch it and debug it if necessary!
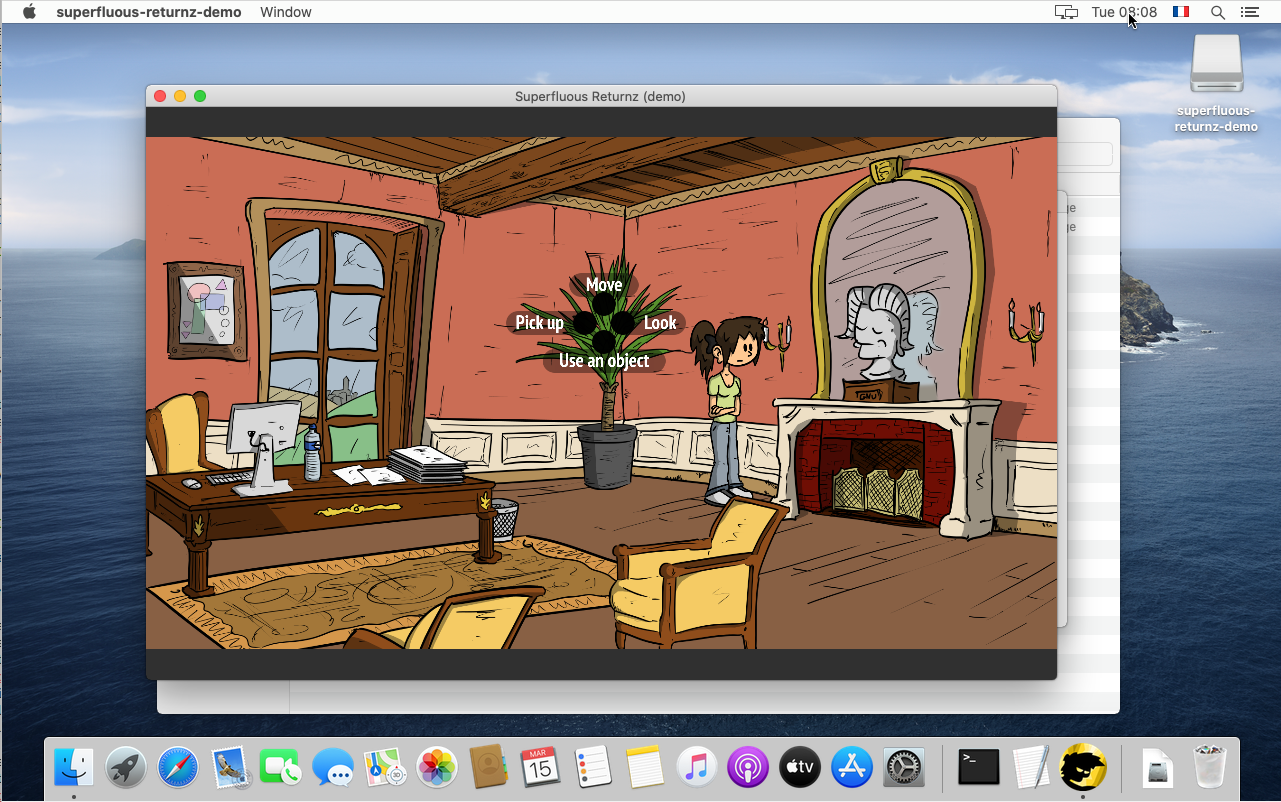
A big advantage of MacOS over Windows: the standard C++ outputs
std::cout and std::cerr work directly in the terminal like on
Linux, so there is no need to adapt the code. In fact, I may have
defined a MAC macro as for other operating systems:
#if defined(__ANDROID__)
#define SOSAGE_ANDROID
#elif defined(__APPLE__)
#define SOSAGE_MAC
#elif defined(_WIN32)
#define SOSAGE_WINDOWS
#define WINVER 0x0600 // Enable use of locale functions
#elif defined(__linux__)
#define SOSAGE_GNUNUX
#endif
... but I have to admit I've never have to use it so far, which is pretty neat! The less code specific to each OS, the easier it is to maintain.
Conclusion
Cross-compiling from Linux to MacOS definitely requires more effort than cross-compiling to Windows: the lack of dedicated software in the repositories of common Linux distributions and the lack of a CPack generator for MacOS on Linux are the two black spots.
However, with a little patience and plenty of disk space, it can be done! Many thanks to the people behind the OSXCross and macos-virtualbox software without whom all this would undoubtedly be much more complicated.
